A terminology refresher might be helpful at this time.
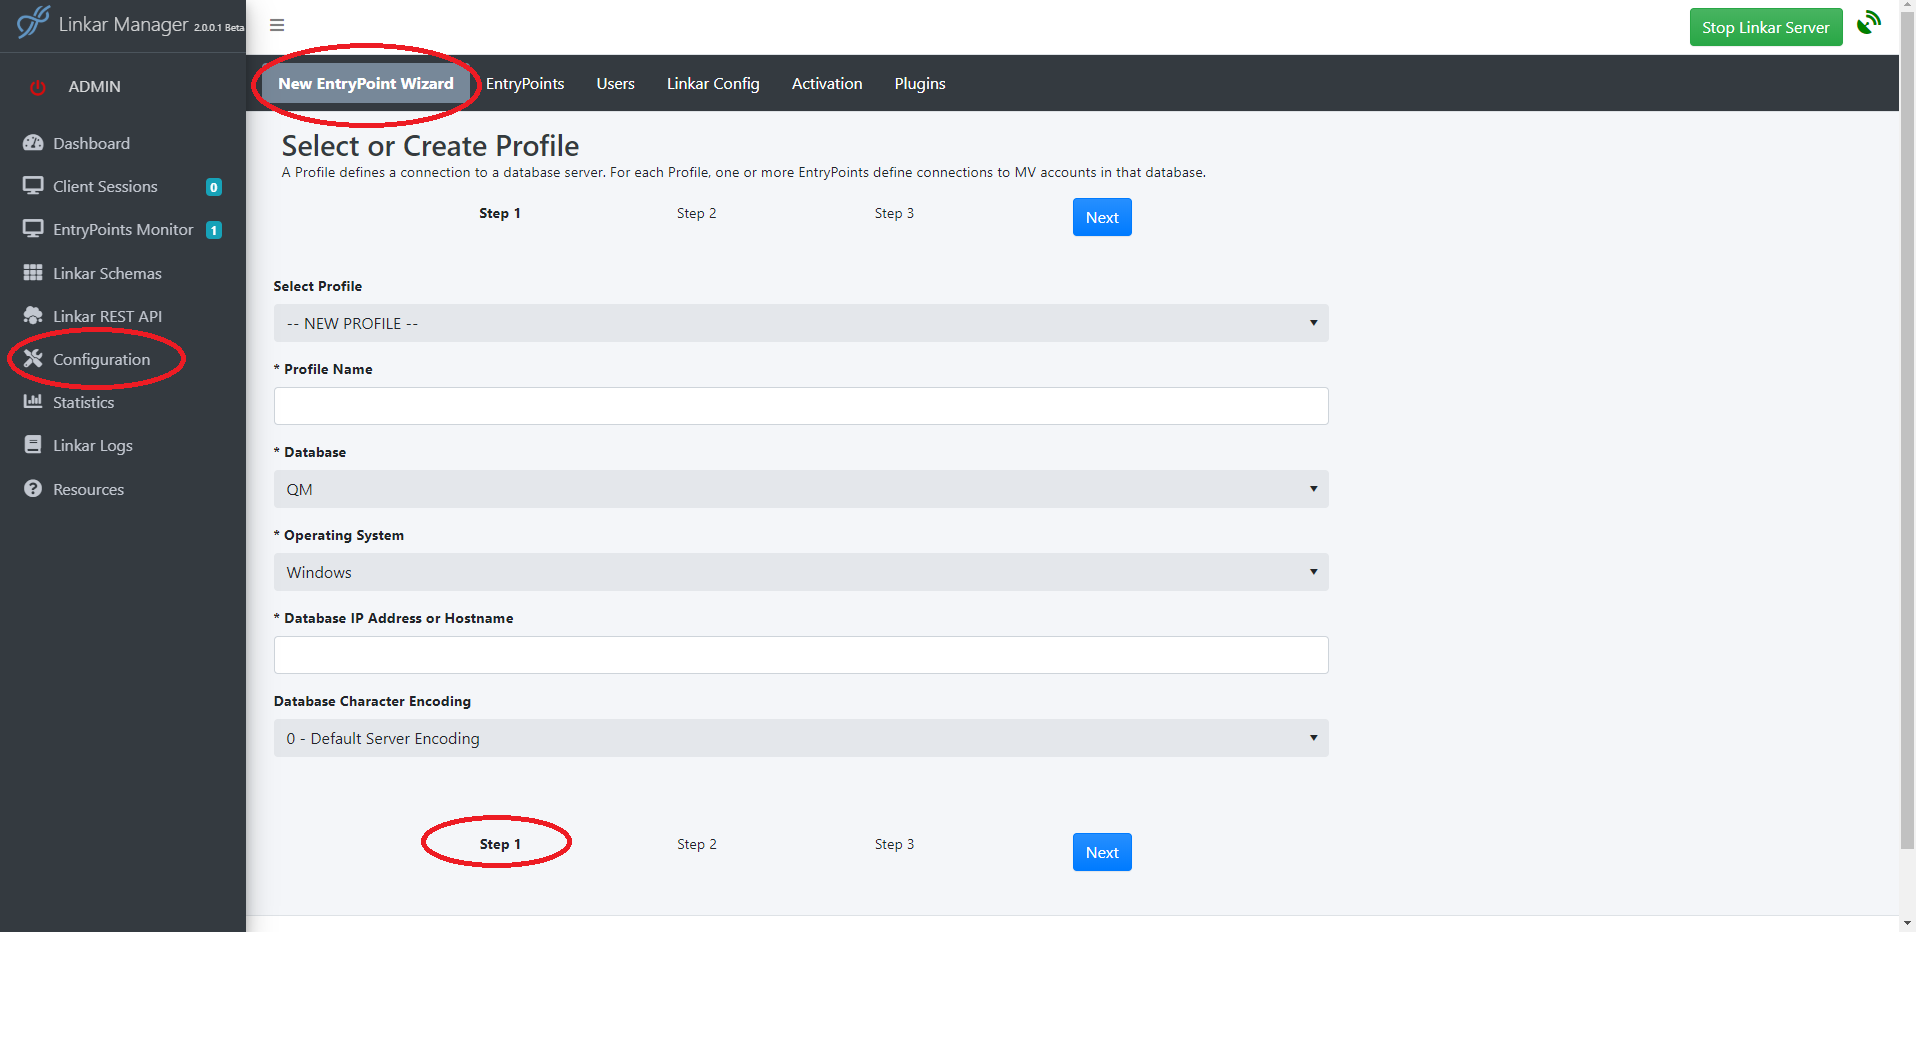
The EntryPoint Wizard guides you to configure a complete connection, with a new or existing Profile, EntryPoint, MV Components, and with a connection test.

Step 1: Profile
An existing Profile can be selected using the provided drop-down list - all fields in the Profile screen become read-only.
A new Profile can also be created:
•Enter a Profile name - alpha only, no alpha-numerics, Upper/Lower casing is allowed.
•Select the type of database from the drop-down.
•Select the operating system on which the database is installed.
•Enter the IP Address or DNS-accessible hostname to access the database server.
•Change the default Database Character Encoding if required.
If required, please, refer to Profiles section for more details
Once the Profile is defined, press the Next button to create the EntryPoint.
Step 2: EntryPoint
There is a common set of data for all databases, and details that are unique to each DBMS type.
Please, refer to EntryPoint Configuration for details.
Step 3: Connection Type
In this step the details entered depend on the database and the type of connection selected for in EntryPoint Configuration.
Please, refer to Connection Types for details.
From there configure the specific Connection Type (Terminal, Sockets, etc).
Then come back to this step.
On completion of this definition of the database connection, click End:

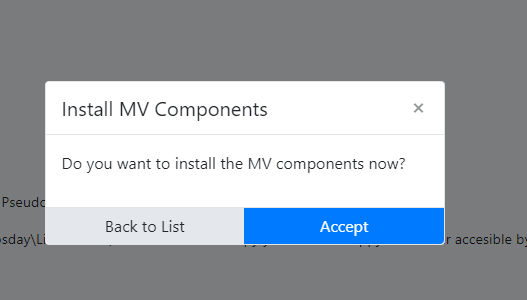
The Wizard will redirect you to a new modal dialog over the EntryPoint MV Components page.
If creating a new Profile, the prompt is to Install MV Components.
For an existing Profile, the prompt is to Enable the EntryPoint.

Clicking Accept simply closes the modal dialog.
"Back to List" returns to the Profile/EP grid.
The EntryPoint MV Components page is documented in a dedicated topic under EntryPoint Configuration.
On completion of this step, the EntryPoint Wizard has provided a guide to create, configure, and enable an EntryPoint for immediate use.