The installer file of Linkar Web Services has the following name:
LinkarWS_Setup_Win_x64_x_y_z.exe
Where “x”, “y” and “z” stand for the numbers corresponding to the program version.
Make sure that the file have all execution permissions assigned. Otherwise, run the following command to give the file the permissions needed:
sudo chmod a+x LinkarWS_Setup_Linux_x64_1_1_0_8
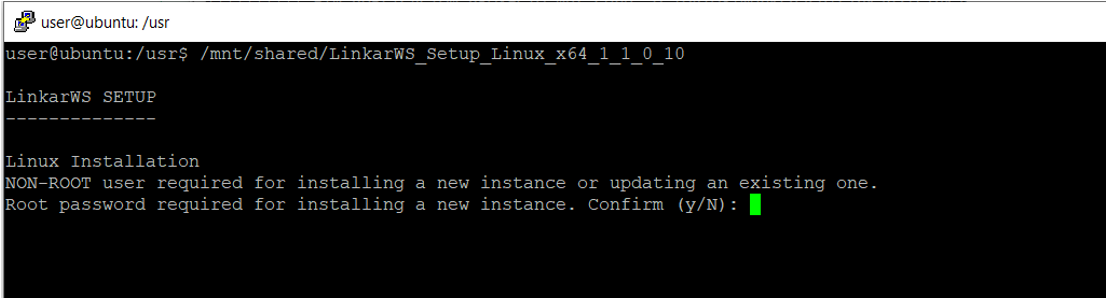
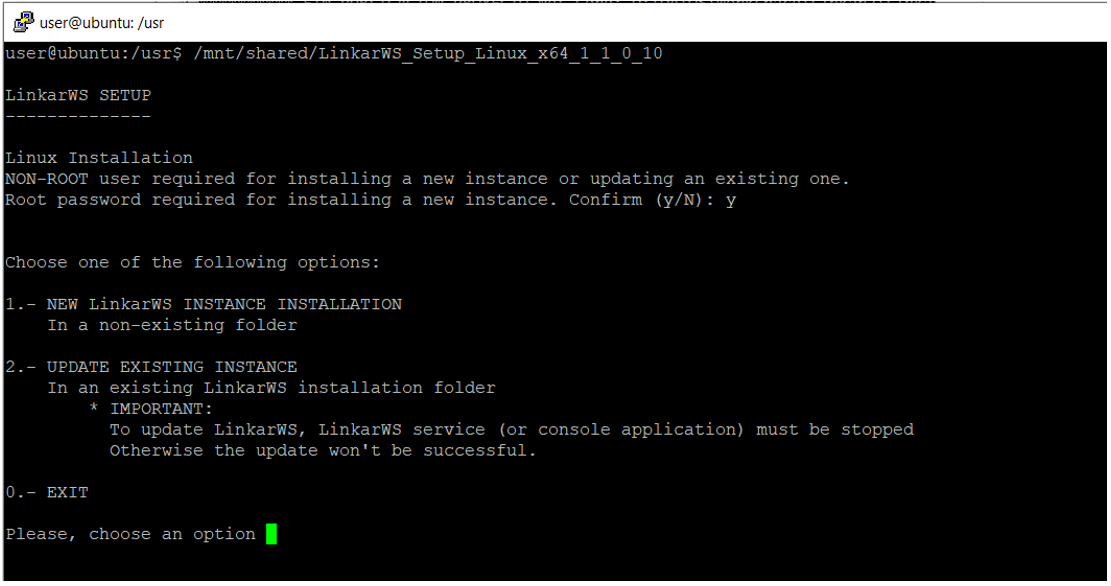
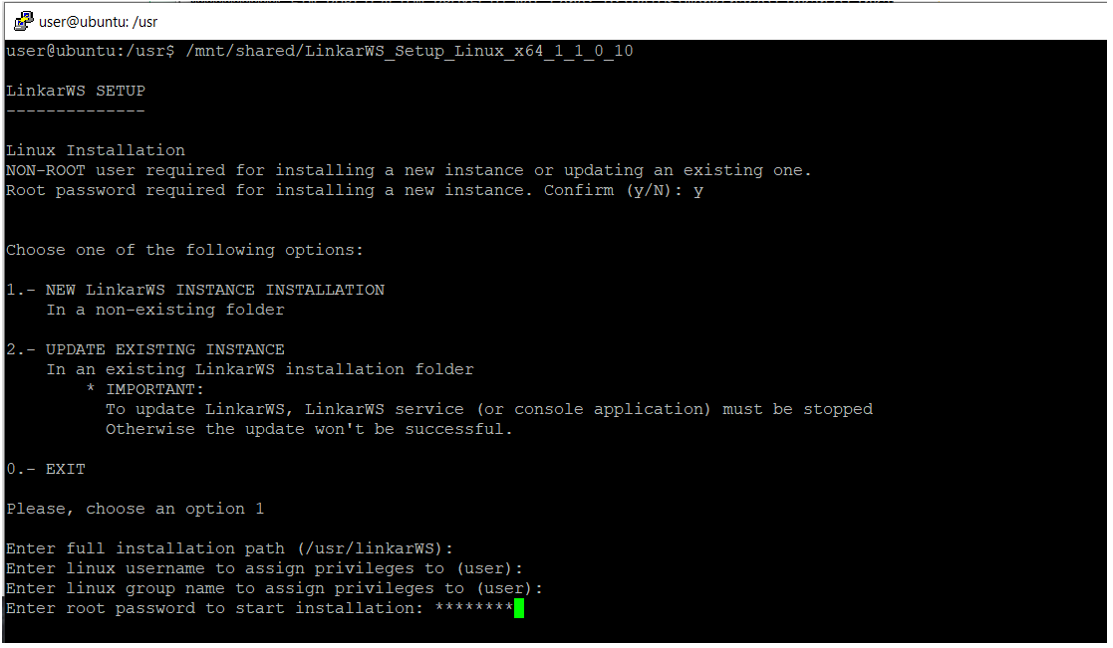
To start the installation or update, run this file from the terminal or console with a no root user. Moreover, Root password will be required during the installation process.
./LinkarWS_Setup_Linux_x64_1_1_0_8
Before proceeding, the program will ask you to confirm that the installation is being executed as no root user. If that's the case, press they "Y" and "Enter" keys.
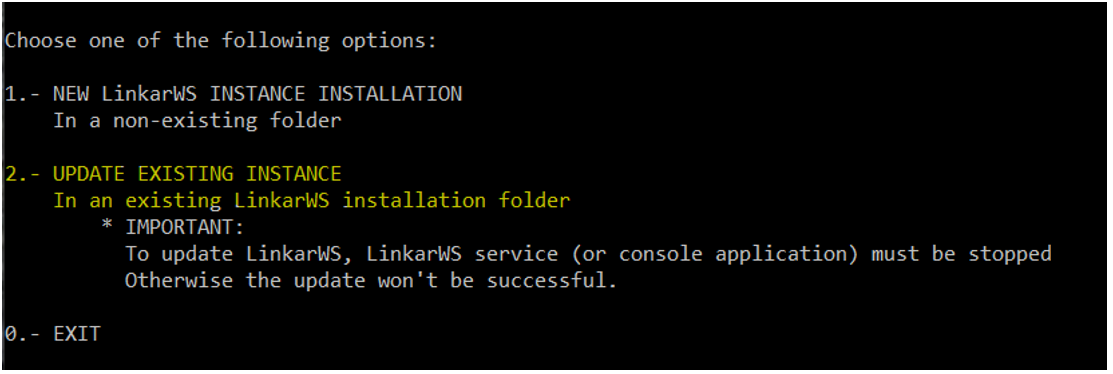
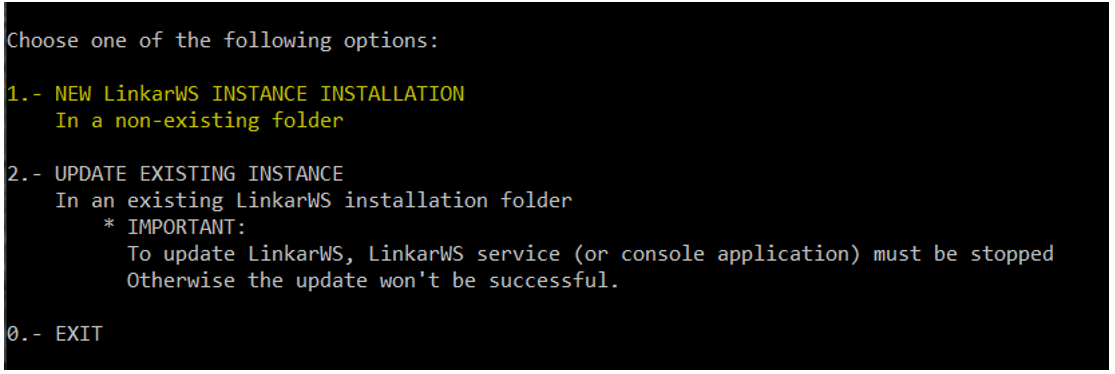
The installation menu has the following options:
1.- Install a new instance of LinkarWS
2.- Update an existing instance
0.- Exit
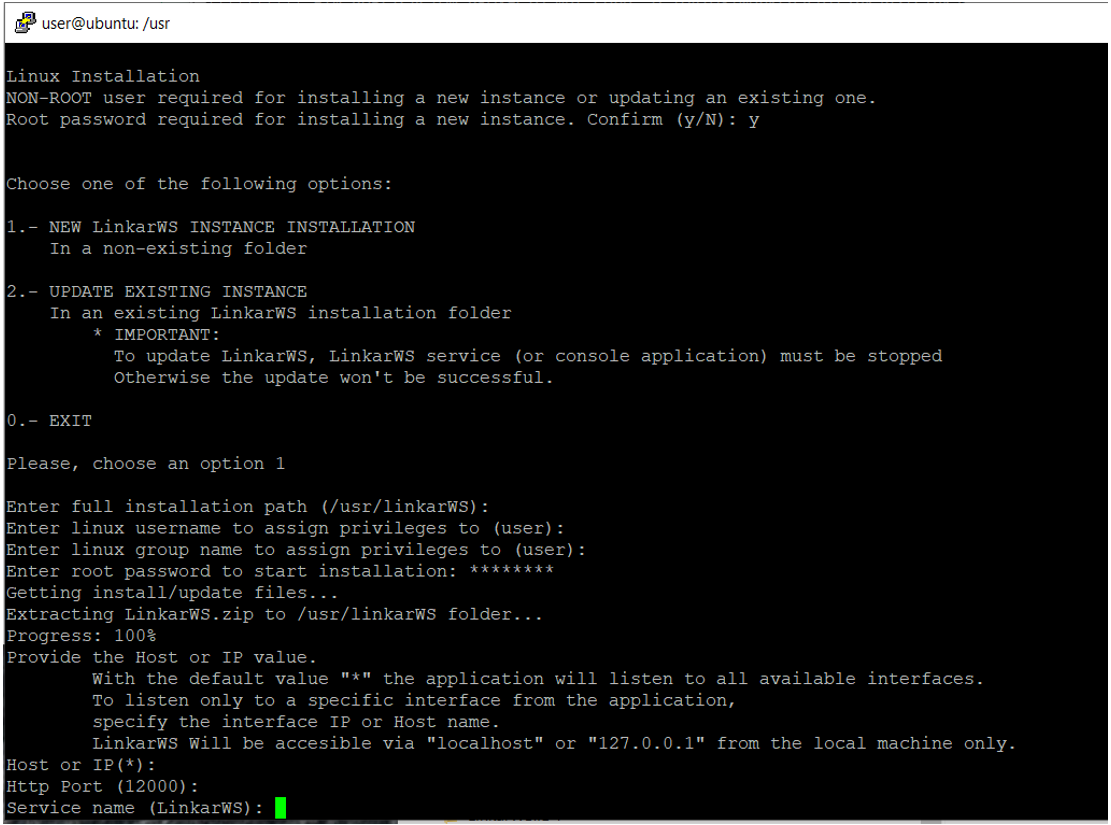
 Installation of a new instance
Update of an existing instance
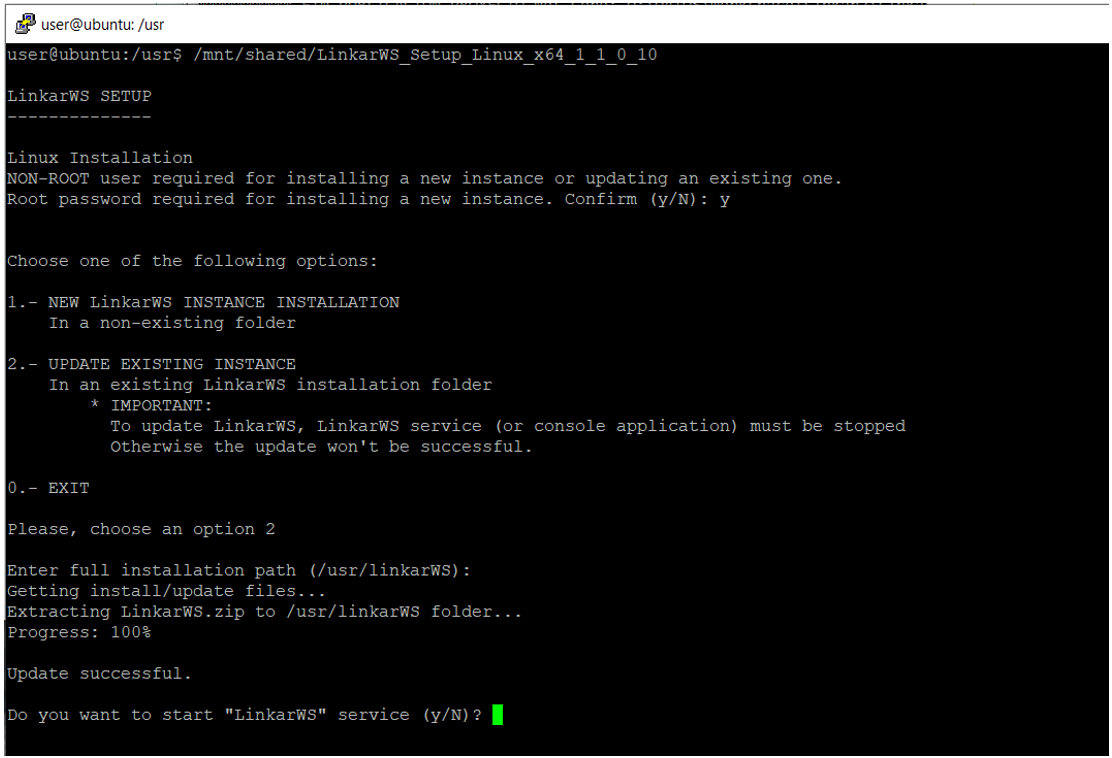
We will update an existing LinkarWS instance by choosing option 2 on the main menu.
An application must be stopped before being updated. If a runninfg application is detected, the update process will be cancelled.
If the validation process determines that the indicated folder exists and contains a valid LinkarWS Installation, the update process will begin.
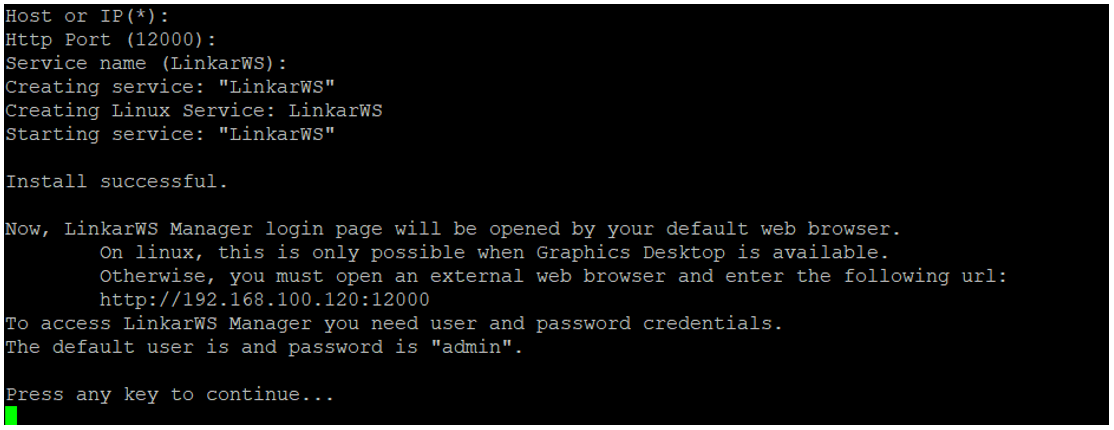
The update process will copy the new files to the corresponding folders. Once finished, will ask you to start the Linux service. If started, and if the access to LinkarWS Manager is enabled (AdminMode), the default browser will load the login website, as long as the terminal if the Linux terminal or console is running on a Graphic Desktop context. |